Onewheel GT Hub & Tire Replacement
Written By: Justin Velasquez

Difficulty: Moderate
Steps: 9 – 13
Time Required: 1 – 2 hours
Introduction
If your Onewheel GT tire is worn down or you’re just ready for a new one, use this guide to help you change it and get right back to riding!
For your safety, power off your Onewheel GT prior to disassembly. This reduces the risk of electrical malfunctions and/or damage during the replacement process.
Note: Altering or damaging any component of your Onewheel GT during disassembly/reassembly may render your existing warranty void or lead to refusal of non-warranty service at the discretion of Future Motion, Inc. (the creators of Onewheel).
Step 1 Remove the fender/delete screws and fender/delete
- Remove all four (4) screws using a TP25 bit.
- Note: Keep screws organized as they are easy to mix up and/or lose.
- To remove the fender/delete, apply pressure to each side of it, near the axle carriers, and pull it up and away from the Onewheel GT.

Step 2 Remove the maghandle screw and maghandle
- Remove the one (1) screw using a 3 mm hex bit.

Step 3 Remove the bottom front bumper screws and front bumper
- Remove all four (4) screws using a TP25 bit.
- To remove the front bumper, pull it toward the nose of the Onewheel GT.

Step 4 Remove the front footpad connector and bottom front footpad screws
- Caution: For the front footpad sensor connector, turn (counter-clockwise) only the smaller part of the connector closest to the controller. Turning the entire body of the connector can damage it or your controller.
- Note: If you are unable to remove the footpad sensor connector using your fingers, you may use a Future Motion™ footpad connector wrench or a pair of long nose pliers (be gentle).
- Remove the two (2) screws using a TP25 bit.

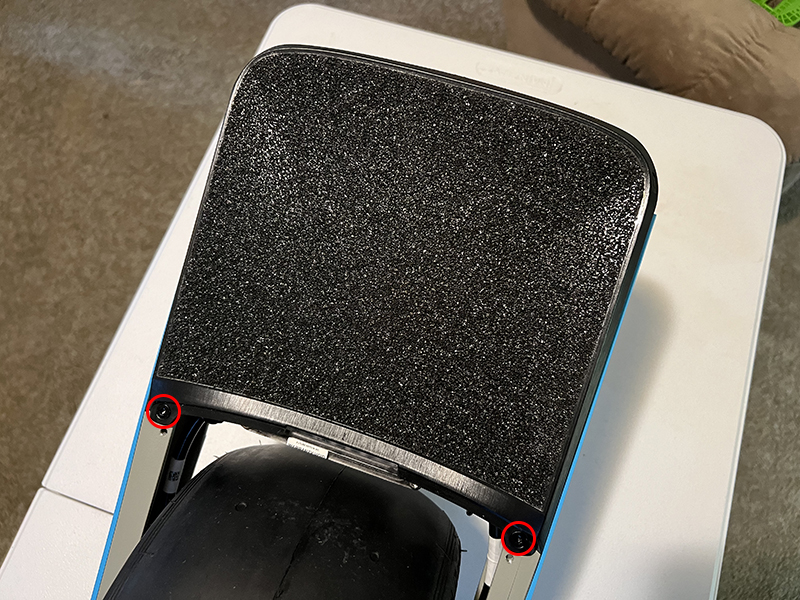
Step 5 Remove the top front footpad screws and front footpad
- Remove the two (2) screws using a TP25 bit.

Step 6 Disconnect the motor connector
- Caution: For the motor connector, turn (counter-clockwise) only the smaller part of the connector closest to the controller. Turning the entire body of the connector can damage it or your controller.
- Note: If you are unable to remove the motor connector using your fingers, you may use a pair of long nose pliers (be gentle).

Step 7 Remove the cable retainer screws and cable retainers
- Remove all four (4) screws using a TP25 bit.
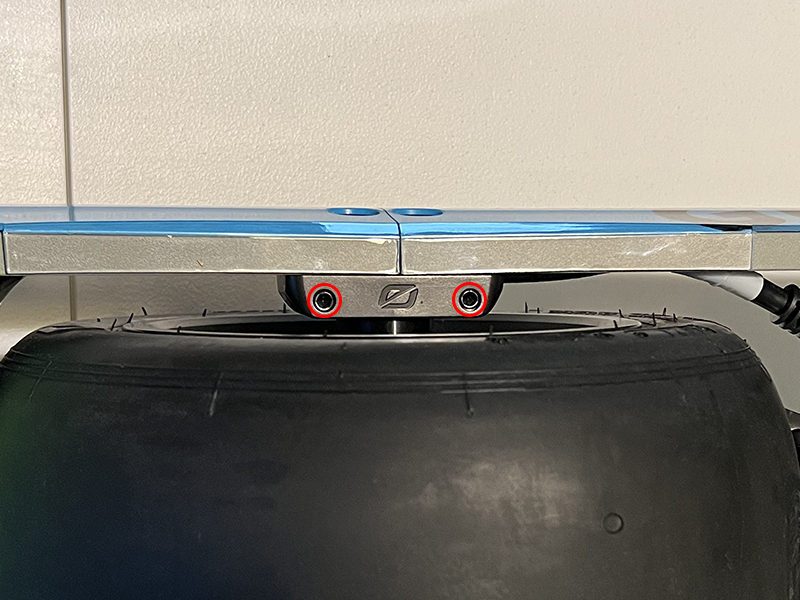
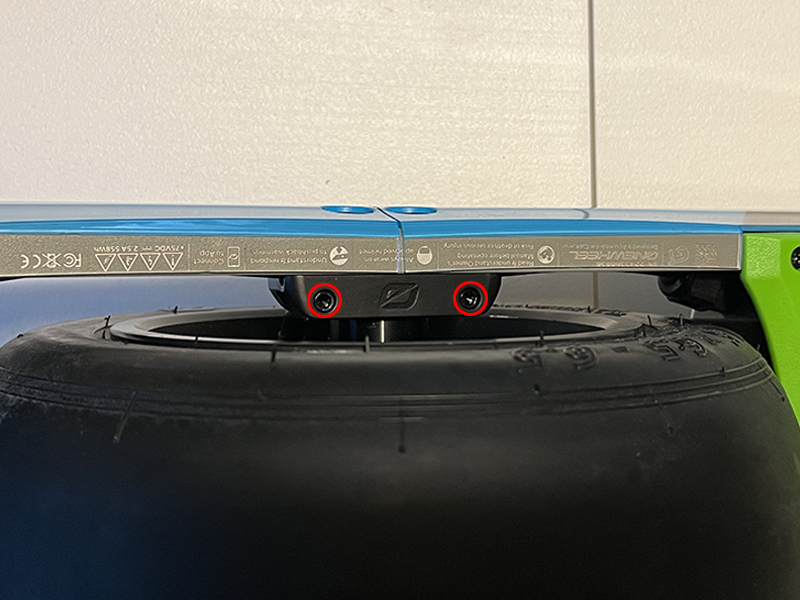
Step 8 Remove the hub bolts
- Remove all four (4) bolts using a TP45 bit.
- Caution: Be sure to use the appropriate bit as these bolts are prone to stripping.

Step 9 Remove the hub/tire assembly
- The hub and tire assembly can be removed by lifting it through the bottom of the rails (in order to clear the axle carriers).
- Caution: Be careful not to damage the motor cable as you separate the hub from the rails. The cable must be gently manipulated in order to allow adequate clearance during removal.
- Note: The axle carriers may come loose and fall out of the rails. This is not an issue. Set them aside until you are ready for reassembly.
** If you need to remove your tire, proceed to Step 10. **
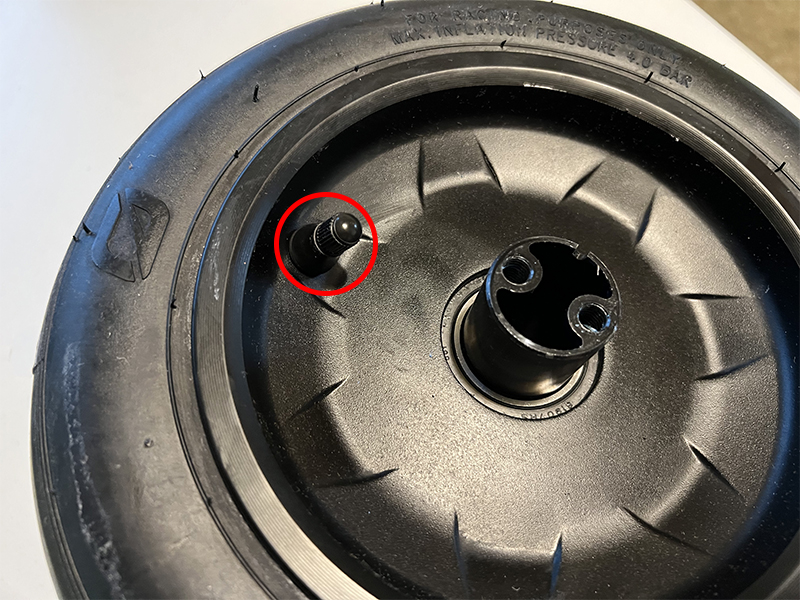
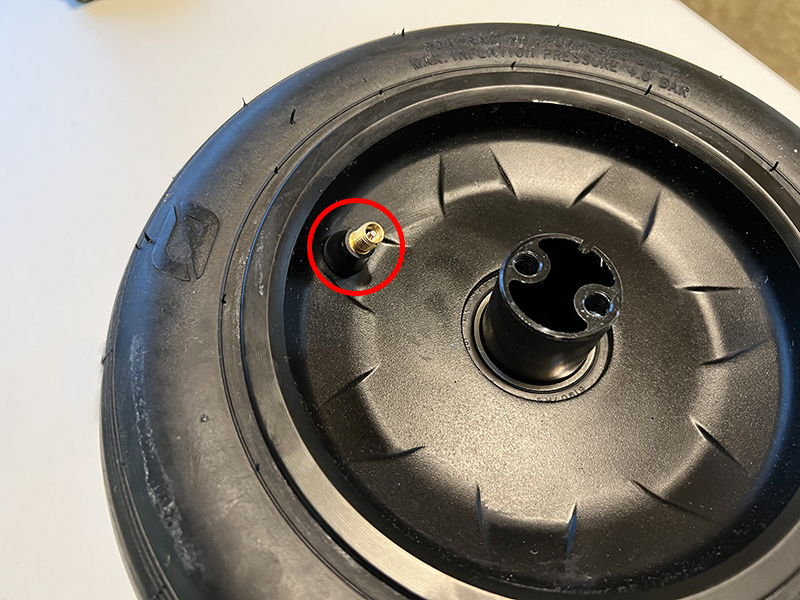
Step 10 Remove the valve cap and core
- Use a valve core removal tool to remove (counter-clockwise) the valve core.
- Caution: Due to the pressure within the tire, the valve core can shoot out of the valve if removed too quickly. The escaping air may also be extremely cold due to the pressure. Loosen the valve core slowly to allow some of the air to escape prior to fully removing it from the valve.
Step 11 Break the tire beads
- Use a bead breaker to free the tire beads from each side of the hub.
- Caution: Be extremely careful not to damage the motor cables, connectors, or the hub during this step.

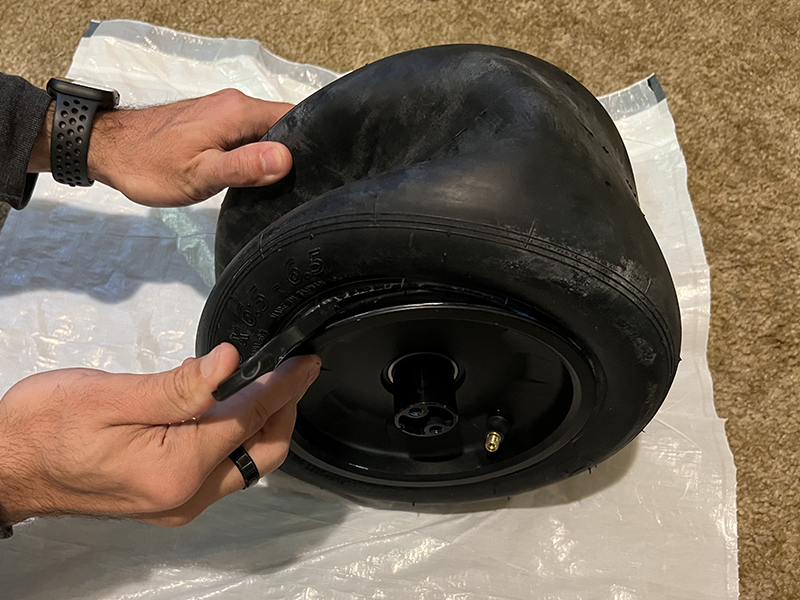
Step 12 Remove the tire
- Starting on the side of the hub opposite of the motor cable, use a nylon tire lever to lift the tire bead over the rim of the hub.
- Caution: DO NOT use metal tools to remove the tire from the hub.
- To make this step easier, press the side of the tire, on the opposite side of the hub as the motor cable, inward (toward the center of the hub). This will allow the bead to fall into a channel/groove which will make it easier to lift the opposing side of the bead over the rim and free that side of the tire from the hub.
- Once you have lifted the bead over the rim on the first side of the tire, you can pull the other bead over the rim as well. No special tools should be required for the second bead.
- Note: This process may seem difficult/tricky the first few times you do it, but it gets easier over time. You’ve got this!

Step 13 Clean the hub
- Use shop towels to clean any remaining tire sealant or debris from the hub.
- Caution: Be extremely careful not to damage the motor cable or the hub itself during this step.

© 2024 FixMyPEV ™ All Rights Reserved.